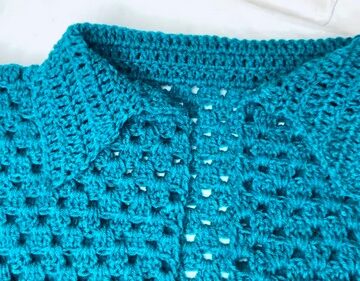
Get your crochet hook and yarn, and let's make a beautiful volumetric beret hat! This project is perfect for adding a stylish twist to your wardrobe or making a heartfelt gift for someone special. With simple stitches and a bit of patience, you'll create a cozy, textured hat that's both fashionable and warm.
Crochet Volumetric Beret Hat

Materials Needed:
- Alize Lanagold Classic Yarn (49% wool, 240 m per 100 g, color 161)
- Crochet hooks in sizes 4 mm and 5 mm
- Plastic marker
- Large-eye plastic needle
Pattern Instructions
Band (Ribbing)
Starting the Band:
- Using the 4 mm hook, chain 8 stitches.
- Start in the second chain from the hook, work single crochet back across (7 stitches total per row).
Ribbing Rows:
- Chain 1, turn.
- Working in the back loops only, single crochet across each stitch.
- Repeat these steps until the band measures 46 cm, which should approximate to 75 rows.

Joining Band:
- Fold the band in half.
- Slip stitch the ends together by working through the outer loops of each side to form a circle.
Body of the Beret

Switch to 5 mm Hook:
- Chain 3 (counts as first double crochet).
- Work a round of double crochet stitches into each ribbing loop from the band.
Establish Pattern:

Row 1:
- Chain 3, double crochet in next, single crochet in next, chain 2, two double crochets in next, repeat from around.
- Slip stitch to join to the top of the chain 3.
Continue Pattern:

Row 2 and Beyond:
- Chain 3 at the start of each row. Work front relief single crochets, double crochets in the chain spaces, and continue the increases as established until you reach desired width before decrease starts.
- Decreasing for Crown
Start Decreases:

Deciding on Decreases:
- At the 13th row, introduce decreases by evenly placing them around; typically by working two stitches together at marked sections.
- Continue to alternate decrease rows with standard rows (working two stitches together over the arches) until you reach approximately 5 reports or sections.
Closing the Beret:
- In the final rows, continue to decrease until only a few stitches remain.
- Cut the yarn, leaving a long tail, pull through all remaining stitches, and secure tightly.
Finishing Touches

Weave in Ends:
- Use the needle to run the yarn through the wrong side to secure and hide any loose ends.
Blocking (Optional):
- To give the beret a professional finish and perfect shape, consider blocking it by slightly dampening and setting it on a flat surface to dry in shape.
Additional Tips
Try On as You Go:
- Frequently try on the beret to ensure a comfortable fit, especially before starting the decrease rows.
Adjusting Size:
- Rows can be added or reduced according to head size or desired slouch.
Yarn Variations:
- Feel free to use different yarn weights but adjust the hook size and expect a change in the beret’s size and drape.


Leave a Reply