
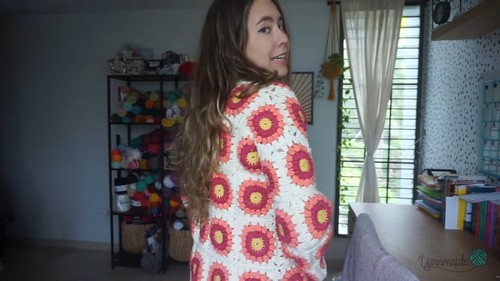
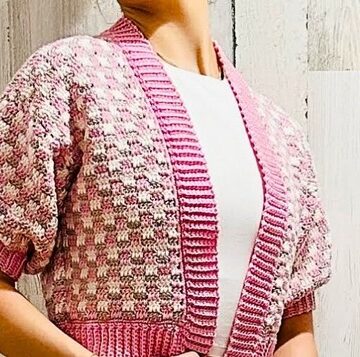
The Crochet Sunburst Granny Square Cardigan is a vibrant, customizable layering piece created from beautifully textured sunburst squares. This pattern guides you through making each square with puff stitches, clusters, and color changes that give the design its signature radiance.
Crochet Sunburst Granny Square Cardigan
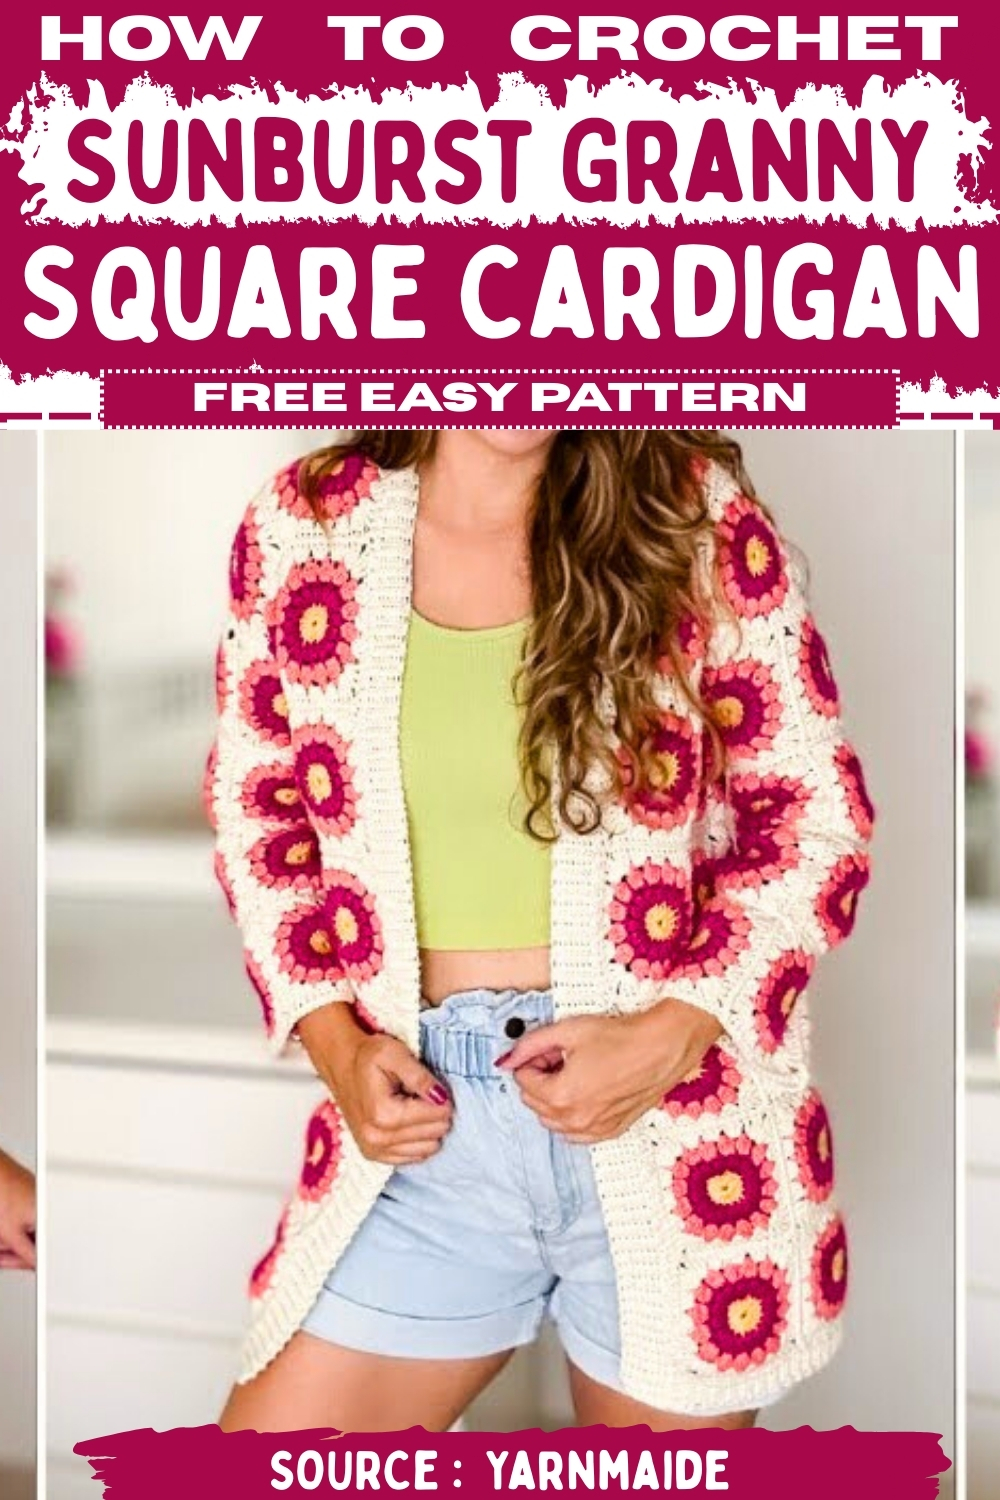
Once all the squares are completed and joined, the cardigan is shaped with clean seams and finished with ribbed edges for a polished, comfortable fit. Whether you prefer soft pastels or bold color palettes, this cardigan can be tailored to your style and size, making it a versatile and eye-catching wardrobe addition.
Materials
- Cotton yarn in four colors
- 5.7 mm hook
- Scissors
- Yarn needle
- Make 93 squares (or adjust for your size)
Sunburst Granny Square Pattern
Center
- Make a magic ring
- Chain 2
- Work 16 double crochets into the ring
- Pull the tail to close
- Slip stitch into the first DC
- Chain 1 and cut yarn

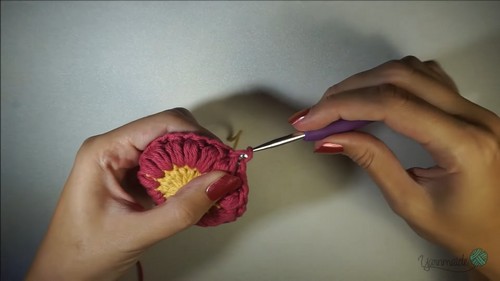
Puff Stitches
- Attach a new yarn color into any DC
- Chain 2
- Make a 3-time puff stitch in the same stitch and chain 1
- Work a 4-time puff stitch in each next stitch and chain 1 after each
- Make 16 puff stitches total
- Slip stitch into the chain-1 space
- Chain 1 and cut yarn
Double Crochet Clusters
- Attach a third color into any chain-1 space
- Chain 2
- Work a 3-DC together cluster and chain 2
- Make a 4-DC together cluster in each chain-1 space and chain 2 after each
- Make 16 clusters total
- Slip stitch into the chain-2 space
- Chain 1 and cut yarn
Forming the Square
- Attach the final color into any chain-2 space
- Chain 2 and make 2 DC in the same space
- Make a corner with 3 treble crochets, chain 2, and 3 treble crochets
- Work 3 DC in each of the next three chain-2 spaces
- Repeat the sequence of corner then three side groups until reaching the start
- Slip stitch into the chain 2
- Chain 1 and cut yarn
Assembly and Finishing
Blocking the Squares
- Wet each square and pin it into a neat square shape
- Allow all pieces to dry fully before joining
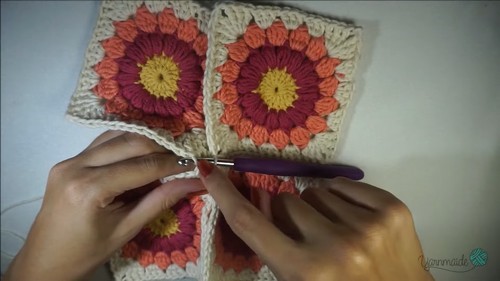
Joining the Squares
- Arrange the squares in the cardigan layout
- Place two squares with right sides together
- Insert the hook into the top loop of the back square and both loops of the front square
- Slip stitch along the seam
- Repeat for every panel until the cardigan shape is complete
Adding Ribbing
Bottom Ribbing
- Attach yarn at the bottom edge
- Chain 1 and work single crochet across the whole edge
- Chain 6 and turn
- Single crochet in the second chain and across for 5 stitches
- Slip stitch into the next two stitches of the foundation row
- Turn and work single crochet in the back loop only for all 5 stitches
- Chain 1 and turn
- Repeat the ribbing sequence across the entire bottom
Front Panel Ribbing
- Work the same method used for the bottom ribbing
- Chain 9 at the start to create a thicker ribbing
Sleeve Border
- Work one round of single crochet around each sleeve edge to smooth and straighten


Leave a Reply