
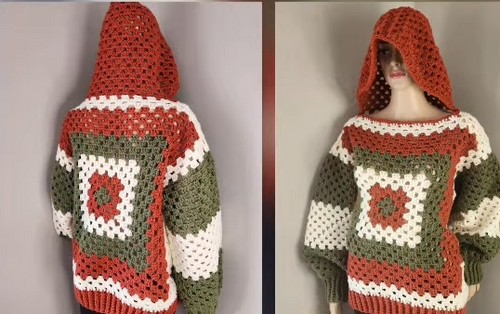
This Easy Crochet Hooded Granny Square Bomber Sweater is a perfect project for those looking to add a cozy, stylish garment to their wardrobe. Using just two large granny squares, this pattern is beginner-friendly and offers a comfortable fit, with clear instructions to help you every step of the way.
Crochet Hooded Sweater

With a timeless hooded bomber design, it's both fashionable and functional for the colder months. The versatility of the granny square allows you to experiment with colors, making it easy to customize and match your style. Whether you're making it for yourself or as a gift, this sweater is sure to impress!
Materials
- 6 mm hook
- Yarn (color of choice for body and hood)
- Scissors
- Darning needle
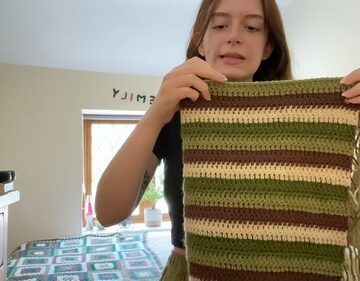
The Granny Square (Body Panels)
- Make 2 identical squares for the size Large (18 rows each).

Round 1:
- Create a Magic Ring.
- Chain 3 (counts as first DC), then place 2 DC in the ring.
- Chain 3 (corner), then place 3 DC in the ring.
- Repeat for four sides to complete the square.
Subsequent Rounds:
- Change colors or continue the same color.
- Chain 3 (counts as first DC), place 2 DC in the same chain space.
- Chain 1, then place 3 DC in the next chain-1 space, and work 3 DC in corner spaces.
- Repeat until you have 18 rows.
- Fasten off the first square. For the second square, do not fasten off.
Assembly (Joining the Squares)
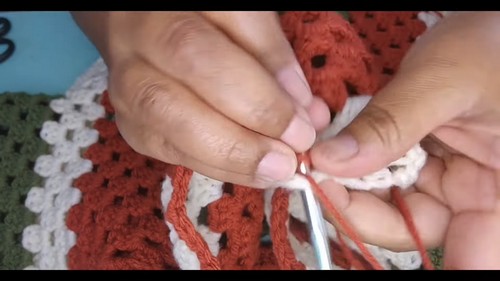
Preparation:
- Turn both squares inside out, ensuring the front sides are facing each other.
Seam the Sides (Armholes):
- Join yarn at the bottom corner, then work 2 single crochets in each chain space and 3 SC in each DC stitch.
- Continue for 10 clusters, then fasten off. Repeat for the opposite side.
Seam the Neckline:
- Line up top edges, join yarn, and repeat the seaming pattern for 4 clusters on each side, leaving the center open for the neckline.
- Fasten off and turn the sweater right side out.
Sleeves
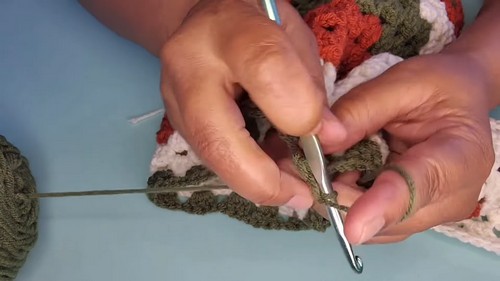
Main Sleeve Pattern (25 Rows):
- Attach yarn at the armhole bottom, chain 3 (counts as first DC), then place 2 DC in the same space.
- Continue with chain 1, 3 DC in each chain space around.
- Repeat for 25 rows.
Sleeve Cuff (Ribbing):
- Set-up row: Slip stitch to close the 25th row. Chain 1 and place 1 DC in the next two stitches, skip the chain space.
- Ribbing rows: Work Front Post/Back Post DC pattern for 10 rounds.
- Final cuff row: Work 1 SC in each stitch around, then fasten off.
Bottom Band (Ribbing)
Set-up Row:
- Insert yarn at the bottom edge, then place 1 DC in every stitch around.
- Slip stitch to join.
Ribbing Rows:
- Work Front Post/Back Post DC for 6 rounds, then fasten off.
The Hood
Neckline Preparation:
- Attach yarn at the neckline edge and work 1 HDC in each space.
- Complete the round and fasten off.
Hood Pattern:
- Flip the sweater to the wrong side. Work increase rows for 10 rows, then straight rows for 13 rows.
- Fasten off after completing the rows.
Closing the Hood:
- Fold the hood and slip stitch to join the top.
- Work 1 SC down the seam and fasten off.
Finishing (Hood Border)
Hood Border:
- Attach yarn where the neckline meets the hood and work 2 HDC in the space before the hood.
- Slip stitch to the hood, then work 1 SC in each space along the edge.
- Fasten off when completed.


Leave a Reply