
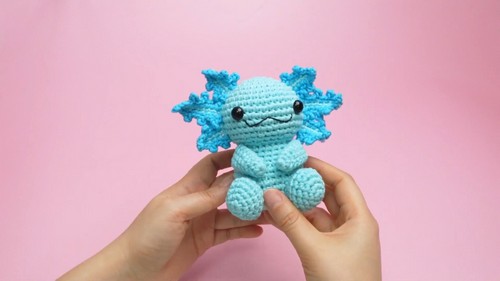
Dive into the enchanting world of amigurumi with our detailed crochet axolotl pattern! This comprehensive guide provides everything you need to create your very own adorable aquatic companion. Perfect for both beginners and experienced crocheters, this pattern breaks down each step into easy-to-follow instructions, ensuring a rewarding crafting experience.
Crochet Axolotl Plushie
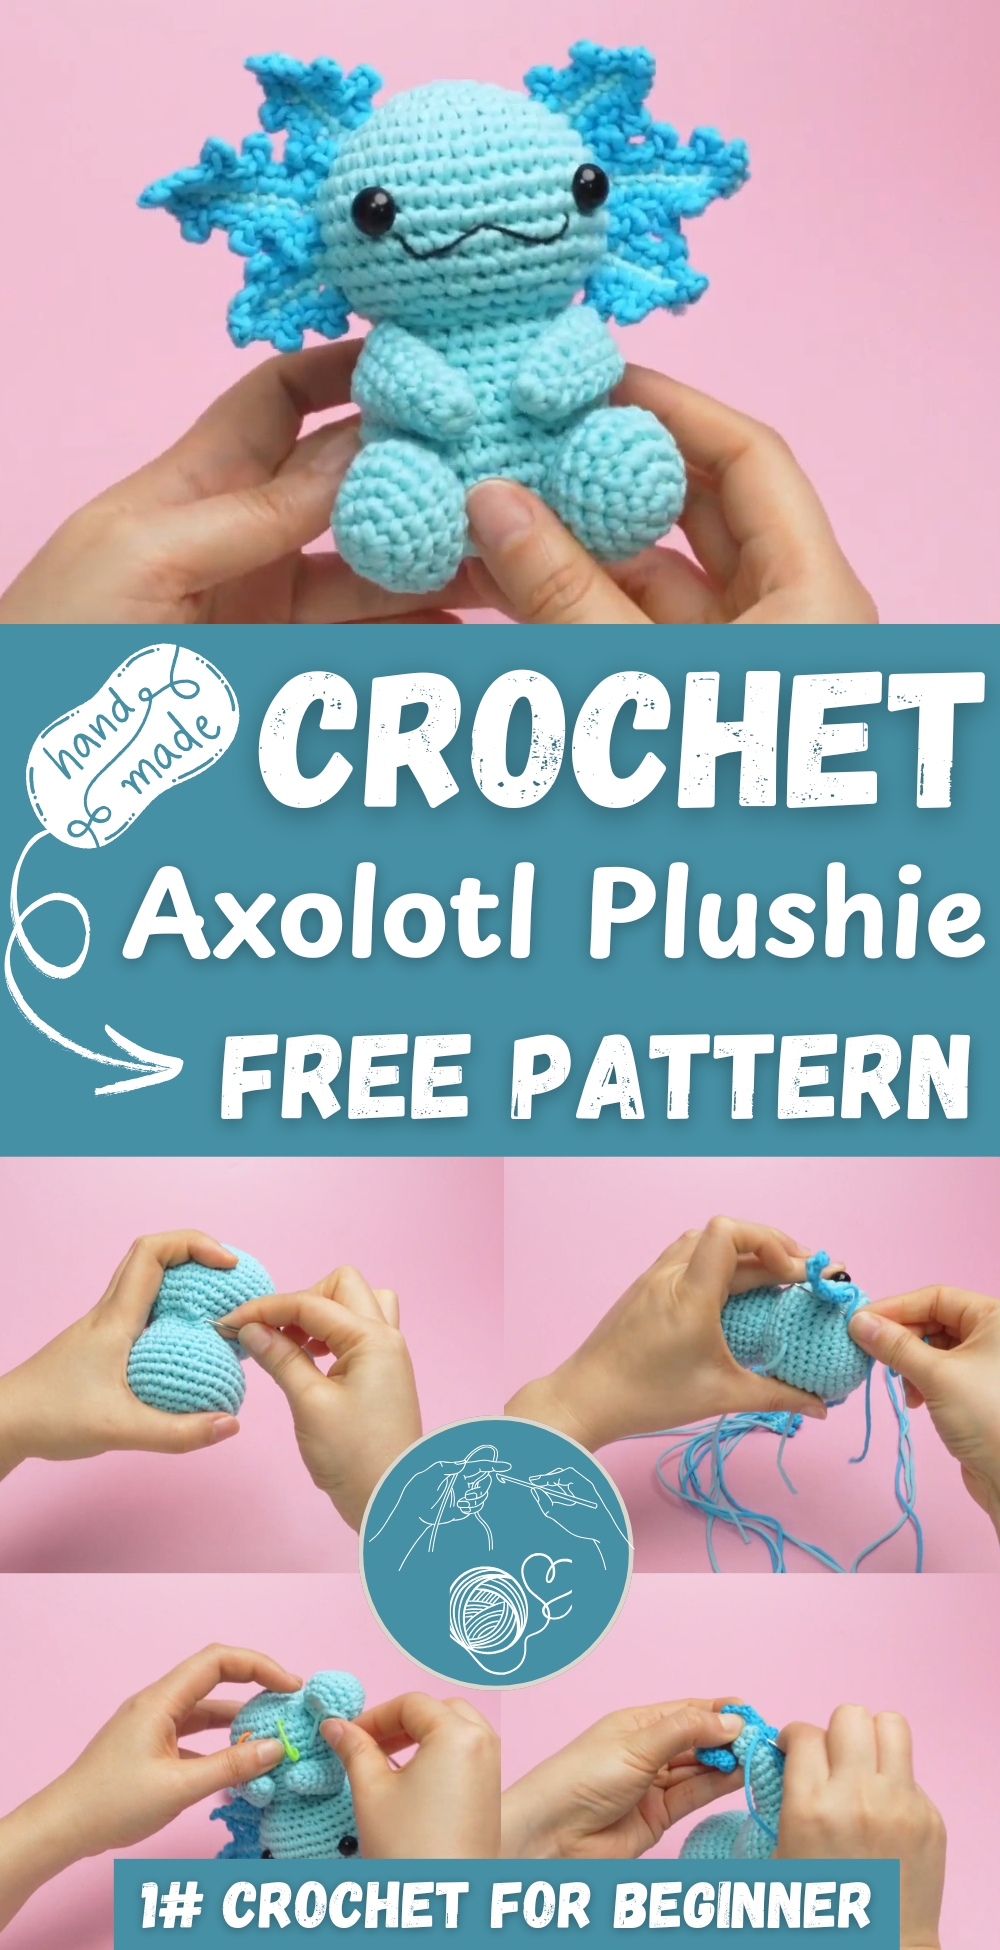
The finished axolotl will be a charming addition to any collection, a unique handmade gift, or a delightful decorative piece. Its soft, huggable form makes it ideal for children, while the intricate details will appeal to collectors. Plus, with options for customization in color and gill style, you can truly make your axolotl one of a kind.
Axolotl Head Pattern
Materials:
- Light blue yarn
- 2.5 mm crochet hook
- Stitch marker
- Sewing needle
- Safety eyes and back pieces
- Stuffing cotton
Holding the Yarn and Hook:
- Magic Ring Setup:
- Hold the yarn end with one palm facing up. Wrap the yarn around your pinky finger once, pass it through your palm between your middle and index fingers, and hang it on your index finger.
- Pinch the yarn end with your thumb and middle finger.
- Wrap the yarn around your middle finger once and press the cross part with your thumb.
- Hook Grip: You can hold the crochet hook like holding a knife (knife grip) or like holding a pen (pen grip). The video demonstrates the pen grip.
- Crocheting Instructions (Basic Stitches):
- Magic Ring (MR): Refer to video for detailed instructions.
- Chain Stitch (CH): Refer to video for detailed instructions.
- Single Crochet (SC): Refer to video for detailed instructions.
- Slip Stitch (SS): Refer to video for detailed instructions.
- Increase Stitch (INC): Crochet two single crochet stitches into the same stitch.
- Decrease Stitch: Refer to video for detailed instructions.
Round by Round Pattern:
Round 1:
- CH 1.
- 6 SC into magic ring.
- SS to join.
- (6 stitches)
- Note: Place a stitch marker on the first stitch of each round.
- To tighten the magic ring: Pull the yarn tail until the gap disappears.
For Round 2:
- CH 1.
- 6 INC.
- SS to join.
- (12 stitches)
For Round 3:
- CH 1.
- (1 SC, 1 INC) x 6.
- SS to join.
- (18 stitches)
Round 4:
- CH 1.
- (1 SC, 1 INC, 1 SC) x 6.
- SS to join.
- (24 stitches)
- Check fabric orientation: The front side has circular bulges. The back side has horizontal lines.
Round 5:
- CH 1.
- (3 SC, 1 INC) x 6.
- SS to join.
- (30 stitches)
For Round 6:
- CH 1.
- (2 SC, 1 INC, 2 SC) x 6.
- SS to join.
- (36 stitches)
Round 7:
- CH 1.
- 36 SC.
- SS to join.
- (36 stitches)
Round 8:
- CH 1.
- (5 SC, 1 INC) x 6.
- SS to join.
- (42 stitches)
For Rounds 9-12:
- CH 1.
- 42 SC.
- SS to join.
- (42 stitches each round)
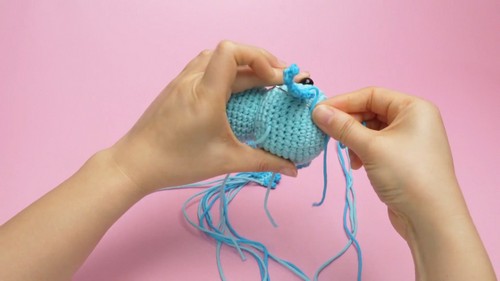
Attaching the Eyes:
- Refer to video for detailed instructions.
Continuing Crocheting:

Round 13:
- CH 1.
- (5 SC, 1 decrease) x 6.
- SS to join.
- (36 stitches)
Round 14:
- CH 1.
- (2 SC, 1 decrease, 2 SC) x 6.
- SS to join.
- (30 stitches)
For Round 15:
- CH 1.
- (3 SC, 1 decrease) x 6.
- SS to join.
- (24 stitches)
Round 16:
- CH 1.
- (1 SC, 1 decrease, 1 SC) x 6.
- SS to join.
- (18 stitches)
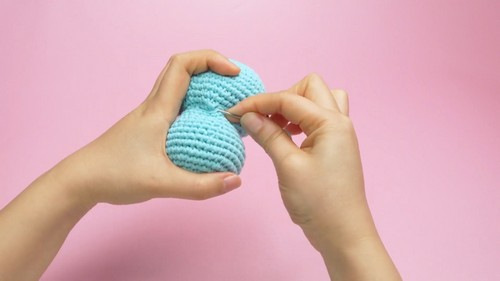
Stuffing:
- Refer to video for detailed instructions.
- Finishing Rounds:
Round 17:
- CH 1.
- (1 SC, 1 decrease) x 6.
- SS to join.
- (12 stitches)
Round 18:
- CH 1.
- 6 decreases.
- SS to join.
- (6 stitches)
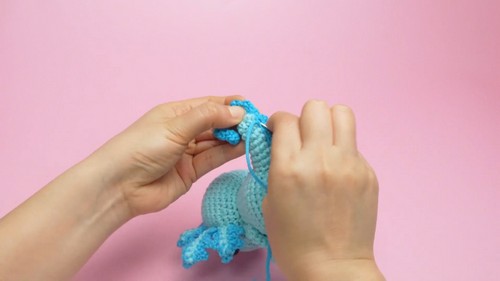
Final Touches:
- Refer to video for detailed instructions.
Axolotl Body Pattern
Body Construction Overview:
- The methods for Rounds 1 to 7 of the body are the same as the first seven rounds of the head.
- Each round starts with a chain stitch and ends with a slip stitch.
- Use blue yarn for the body.
Pattern Instructions:
- Magic Ring & Chain Stitch:
- Start with a magic ring.
- Make one chain stitch to secure the magic ring; this acts as a standing stitch and is not counted in the stitch count.
Round 1: Six Single Crochet (SC)
- Make 6 single crochets into the magic ring.
- Place a stitch marker on the first stitch.
- Pull the yarn tail to tighten the magic ring.
- Work one slip stitch into the first stitch with the marker.
- Stitch Count: 6 SC.
Round 2: Six Single Crochet Increases
- Start with a chain stitch.
- Work 6 single crochet increases (2 SC in each stitch).
- Slip stitch into the first stitch.
- Stitch Count: 12 stitches.
For Round 3: (1 SC, 1 SC Increase) x 6
- Start with a chain stitch.
- Repeat the sequence (one single crochet, one single crochet increase) six times.
- Slip stitch into the first stitch.
- Stitch Count: 18 stitches.
Round 4: (1 SC, 1 SC Increase, 1 SC) x 6
- Start with a chain stitch.
- Repeat the sequence (one single crochet, one single crochet increase, one single crochet) six times.
- Slip stitch into the first stitch.
- Stitch Count: 24 stitches.
Round 5: (3 SC, 1 SC Increase) x 6
- Start with a chain stitch.
- Repeat the sequence (three single crochets, one single crochet increase) six times.
- Slip stitch into the first stitch.
- Stitch Count: 30 stitches.
For Round 6: (2 SC, 1 SC Increase, 2 SC) x 6
- Start with a chain stitch.
- Repeat the sequence (two single crochets, one single crochet increase, two single crochets) six times.
- Slip stitch into the first stitch.
- Stitch Count: 36 stitches.
Round 7: 36 SC
- Start with a chain stitch.
- Work 36 single crochets.
- Slip stitch into the first stitch.
- Stitch Count: 36 stitches.
Assembly Instructions
Connecting the Head and Body:
- Take the completed head and body.
- Sew the body between rounds 15 and 16 of the head.
- Align the slip stitch position of the body with the slip stitch position of the head.
- Place the body between rounds 15 and 16 of the head.
- Sew each stitch, tightening the yarn.
- Hide the yarn end inside the fabric.
- Add stuffing if needed.
Sewing the Gills:
- Sew the big gills on rounds 8 to 10 of the head.
- Ensure symmetrical placement.
- Sew the gill to the marked position.
- Hide the yarn end inside the fabric.
- Sew the small gills on rounds 5 to 7 and 11 to 13.
- Ensure symmetrical placement.
Sewing the Arms:
- Sew the arms onto rounds 13 to 15 of the body.
- Space them about 10 stitches apart.
- Flatten the arm while sewing.
For Sewing the Legs:
- Sew the legs onto rounds 7 to 9 of the body.
- Maintain a 4-stitch gap between the legs.
Sewing the Tail and Tail Fin:
- Sew the tail on the back of the body, from rounds 6 to 9.
- Sew along the edge.
- Hide the yarn end inside the fabric.
Embroidering the Mouth:
- Use one strand of black yarn.
- Embroider the mouth on the eleventh round, leaving eight stitches in between.
- Create a W-shape.
Axolotl Arms Pattern
Round 1:
- Start with a magic ring.
- Make a chain stitch to secure the magic ring, serving as a standing stitch.
- Crochet 6 single crochets into the magic ring.
- Place a stitch marker on the first stitch.
- Tighten the magic ring.
- Finish with a slip stitch in the first stitch.
Round 2:
- Start with a chain stitch.
- Crochet 6 single crochets without increasing or decreasing.
- Finish with a slip stitch in the first stitch.
- Turn the front side of the fabric towards you.
For Round 3:
- Start with a chain stitch.
- Make a sequence of one single crochet, one increase, and another single crochet. Repeat this sequence twice to form 8 stitches.
- Finish with a slip stitch in the first stitch.
Rounds 4-8:
- The method for these five rounds is the same.
- Start each round with a chain stitch.
- Crochet 8 single crochets without increasing or decreasing.
- Finish each round with a slip stitch in the first stitch.
Finishing:
- After Round 8, leave a long yarn tail for sewing and cut the yarn.
- Tighten the yarn end.
- Make a second arm in the same way.
Axolotl Legs Pattern
Round 1:
- Start with a magic ring.
- Make a chain stitch to secure the magic ring, serving as a standing stitch.
- Make 6 single crochets into the magic ring.
- Place a stitch marker on the first stitch.
- Tighten the magic ring.
- Finish with a slip stitch in the first stitch, ensuring it's tightened.
Round 2:
- Start with a chain stitch.
- Make a sequence of one increase, one single crochet, and one increase. Repeat this sequence twice to form 10 stitches.
- Finish with a slip stitch in the first stitch.
For Round 3:
- Start with a chain stitch.
- Make a sequence of one increase, three single crochets, and one increase. Repeat this sequence twice to form 14 stitches.
- Finish with a slip stitch in the first stitch.
Round 4:
- Start with a chain stitch.
- Make a sequence of one increase stitch, five single crochets, and an increase. Repeat this sequence twice to form 18 stitches.
- Finish with a slip stitch in the first stitch.
Round 5:
- Start with a chain stitch.
- Crochet 18 single crochets without increasing or decreasing.
- Finish with a slip stitch in the first stitch.
For Round 6:
- Start with a chain stitch.
- Make a sequence of one decrease stitch, five single crochets, and one decrease stitch. Repeat this sequence twice to form 14 stitches.
- Finish with a slip stitch in the first stitch.
- Hide the yarn end inside the fabric.
Round 7:
- Start with a chain stitch.
- Make a sequence of one decrease, three single crochets, and one decrease. Repeat this sequence twice to form 10 stitches.
- Finish with a slip stitch in the first stitch.
Finishing:
- Remove the crochet hook, leave a long yarn tail for sewing, and cut the yarn.
- Tighten the yarn end.
- Stuff the leg with cotton.
- Make a second leg in the same way.
Axolotl Tail Pattern (Main Body - Light Blue)
Round 1:
- Start with a magic ring.
- Make a chain stitch to secure the magic ring.
- Make 6 single crochets into the magic ring.
- Place a stitch marker on the first stitch.
- Tighten the magic ring.
- Finish with a slip stitch in the first stitch.
Round 2:
- Start with a chain stitch.
- Work 6 single crochets without increasing or decreasing.
- Finish with a slip stitch in the first stitch.
- Turn the front side of the fabric outward.
For Round 3:
- Start with a chain stitch.
- Work a sequence of one single crochet, one increase, and one single crochet. Repeat this sequence twice to form 8 stitches.
- Finish with a slip stitch in the first stitch.
Round 4:
- Start with a chain stitch.
- Work 8 single crochets without increasing or decreasing.
- Finish with a slip stitch in the first stitch.
Round 5:
- Start with a chain stitch.
- Work a sequence of three single crochets and one increase. Repeat this sequence twice to form 10 stitches.
- Finish with a slip stitch in the first stitch.
For Round 6:
- Start with a chain stitch.
- Work 10 single crochets without increasing or decreasing.
- Finish with a slip stitch in the first stitch.
Round 7:
- Start with a chain stitch.
- Work a sequence of two single crochets, one increase, and two single crochets. Repeat this sequence twice to form 12 stitches.
- Finish with a slip stitch in the first stitch.
Round 8:
- Start with a chain stitch.
- Work 12 single crochets without increasing or decreasing.
- Finish with a slip stitch in the first stitch.
For Round 9:
- Start with a chain stitch.
- Work a sequence of five single crochets and one single crochet increase. Repeat this sequence twice to form 14 stitches.
- Finish with a slip stitch in the first stitch.
Finishing:
- Remove the crochet hook, leave a long yarn tail for sewing, and cut the yarn.
- Tighten the yarn end.
- Insert stuffing cotton.
Axolotl Gills Pattern (Light Blue Middle Part)
- This section describes two types of gills: big gills (2 needed) and small gills (4 needed).
Big Gill (Middle Part - Light Blue):
Starting:
- Use a foundation chain.
- Make a slip knot.
- Make 8 chain stitches.
First Row (Crochet backwards):
- Skip the first chain stitch.
- Work 7 single crochets into the back bumps from the second chain stitch.
Finishing:
- Remove the crochet hook, leave a long yarn tail for sewing, and cut the yarn.
- Tighten the yarn tail.
- Small Gill (Middle Part - Light Blue):
Starting:
- Use a foundation chain.
- Make a slip knot.
- Make 6 chain stitches.
First Row (Crochet backwards):
- Skip the first chain stitch.
- Work 5 single crochets on the back bumps from the second back bump.
Finishing:
- Remove the crochet hook, leave a long yarn tail for sewing, and cut the yarn.
Axolotl Gills Pattern (Dark Blue Edge/Second Round)
- This section describes adding the dark blue edge to both big and small gills.
- Big Gill (Dark Blue Edge):
Starting:
- Take dark blue yarn.
- Insert hook through the first insertion position (side with short yarn tail) and pull yarn through.
- Start with a chain stitch.
- Make a single crochet at the insertion position of the chain stitch.
Second Round:
- Make a three-chain picket stitch (three chain stitches, then slip stitch into the first chain stitch).
- In the next insertion position, make a single crochet.
- Repeat the sequence of (one single crochet, a three-chain picket stitch, then another single crochet) six times.
Finishing:
- Leave a long yarn tail for sewing and cut the yarn.
- Tighten the yarn end.
- Cut off the short yarn tail.
- Make another big gill in the same way.
- Small Gill (Dark Blue Edge):
Starting:
- Take dark blue yarn.
- Insert hook through the first insertion position (side with slip knot) and pull yarn through.
- Make a chain stitch.
- Make a single crochet at the first insertion position of the chain stitch.
Second Round:
- Make a three-chain picket stitch.
- Make another single crochet.
- Repeat the sequence of (one single crochet, a three-chain picket stitch, then another single crochet) four times.
Finishing:
- Leave a long yarn for sewing and break the yarn.
- Tighten the yarn end.
- Cut off the excess part.
- Complete the remaining three small gills in the same way.
Axolotl Tail Fin Pattern (Dark Blue Edge)
- The video describes making the dark blue edge that wraps around the tail.
Starting:
- Use a foundation chain.
- Make a slip knot.
- Make 21 chain stitches, maintaining consistent tension.
- First Row (Crochet backwards on back bumps):
- Skip the first chain stitch.
- Make a slip stitch in the second chain stitch.
- Make a single crochet in the next chain.
- Make a half double crochet in the same stitch.
- In the next chain, make one half double crochet and a single crochet.
- Make a slip stitch in the next insertion position.
- Make a single crochet and a half double crochet in the next insertion position.
- Make a double crochet increase stitch (two double crochets in the same stitch) in the next stitch.
- In the next insertion position, make one half double crochet and one single crochet.
- Make a slip stitch in the next insertion position.
- Make a single crochet and one half double crochet in the next insertion position.
- Make two double crochet increases (two double crochets in each of the following two insertion positions).
- Make a half double crochet and a single crochet in the next insertion position.
- Make a slip stitch in the next insertion position.
- Make a single crochet and a half double crochet in the next insertion position.
- Make a half double crochet and a single crochet in the next insertion position.
- Make one slip stitch.
Finishing:
- Leave a long yarn for sewing and cut the yarn.
- Tighten the yarn end.
Part 1:
Part 2:
Part 3:
Part 4:

Leave a Reply