
The Crochet Yotsuba Nakano Amigurumi Pattern brings the vibrant and playful spirit of the beloved character Yotsuba Nakano to life, one stitch at a time! Perfect for fans of The Quintessential Quintuplets, this pattern allows you to create a charming, detailed, and adorable Yotsuba figure that captures her infectious energy and iconic look.
Crochet Yotsuba Nakano Amigurumi
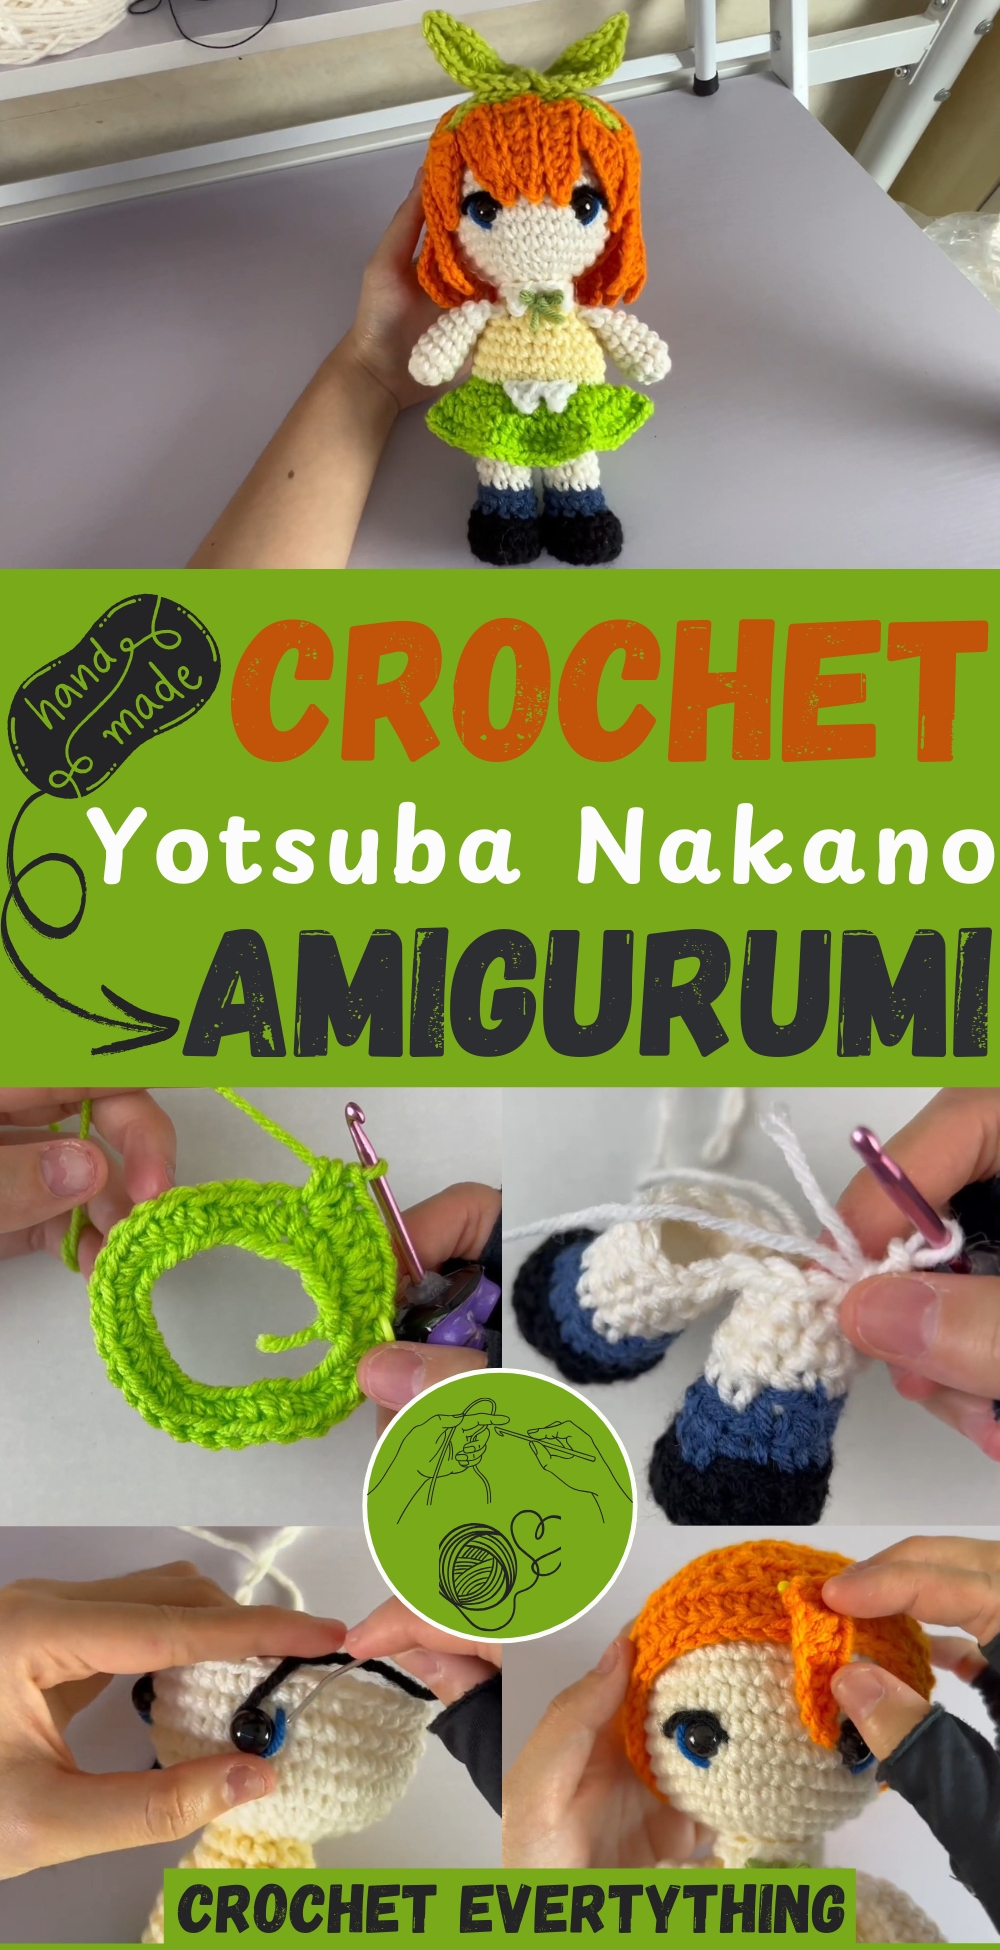
Whether you're a crochet enthusiast or just beginning your crafting journey, this pattern offers a fun and rewarding project that will leave you with a unique handmade treasure. Get ready to stitch up a bit of anime magic and add this cheerful character to your collection!
Supplies Needed:
- 3.5 millimeter crochet hook
- 2.10 millimeter crochet hook for weaving yarn ends
- Stitch marker
- Bent tip yarn needle
- Fabric scissors
- Fabric glue (e.g., Beacon 3-in-1 Fabri-Tac)
- Yarn in various colors (specific brand colors mentioned)
Base Body Pattern:
Arms:
- Using 3.5 mm hook and skin color yarn, create a magic circle and crochet rounds 1 to 6 in skin color. Change to white yarn at the last stitch of round 6.
- Rounds 7 and 8 in white yarn, then close off the arms.
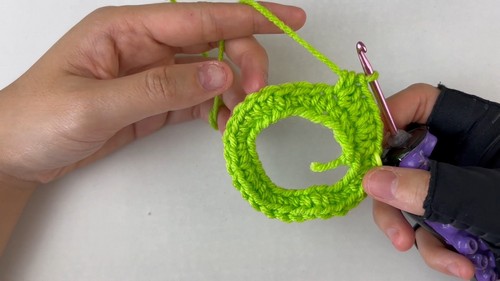
Skirt:
- With bright green yarn (Limelight), chain 28 and join to form a circle.
Round 1:
- Single crochet all the way around.
For Round 2:
- Start with 1 half double crochet, followed by a half double crochet increase, then repeat this a-b pattern around.
Round 3:
- Follow an a-b pattern with single crochets, increasing every other stitch. Cut the yarn and weave in the ends to close off the skirt.
Bow:
- Using green Fern yarn and a 2.10 mm hook, create a slip knot, chain one, and form a simple bow.
Collar:
- With white yarn, chain three.
- Do 1 slip stitch, then 1 single crochet, chain 15, and repeat once.
- Cut a long tail for sewing onto the doll.
Waist Triangles:
- With white yarn, chain three.
- Alternate slip stitch and single crochet to make two little triangles.
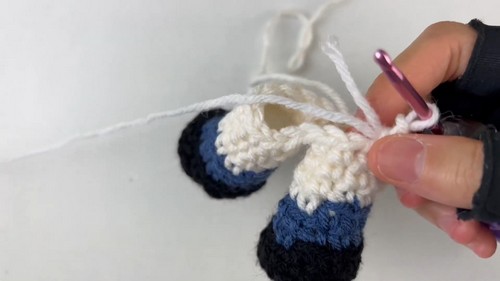
Legs:
- Start with black yarn for rounds 1 through 4.
- Change to Dark Country Blue for rounds 5 and 6, working in the back loop only for round 5.
- Change to skin color and finish rounds 7 through 10, again working in the back loop only for round 7. Join the legs together in round 10.
Body and Head:
Rounds 11 to 12:
- Work in white.
Rounds 13 onwards:
- Change to bright green yarn (Limelight) for the shirt.
- Continue with rounds to make the shirt and head, changing to skin color after round 22.
- Insert straws or a similar material in round 21 for neck stabilization (optional).
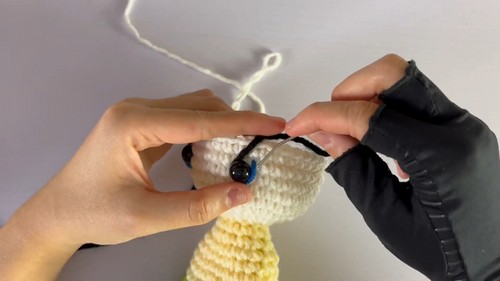
- Complete the head in skin color, stopping to add eyes around round 30.

Finishing:
- Attach arms to the body around round 20.
- Sew on the collar, and glue the bow and waist triangles onto the body.
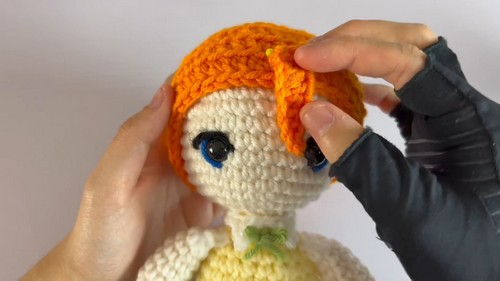
- Create a hair cap using orange yarn and attach it to the doll, then proceed to make the bangs and back hair as instructed.
- Finish with sewing or gluing all the parts securely.


Leave a Reply