
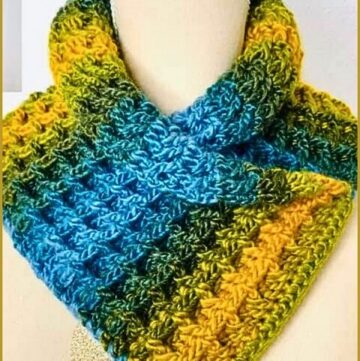
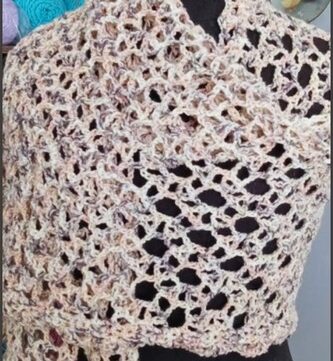
This crochet triangle shawl with attached cowl combines two wardrobe staples into one functional and stylish piece. The triangle shawl is worked from the top center down using an easy two row repeat that alternates between airy mesh and solid double crochet blocks. This creates a lightweight fabric with structure and drape, making it ideal for layering without feeling bulky.
Crochet Triangle Shawl
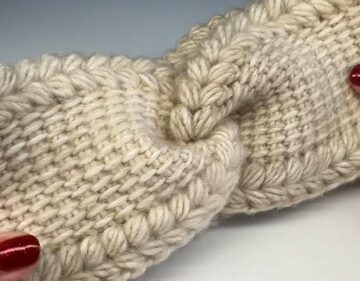
Once the triangle reaches the desired length, the top corners are joined to form a built in cowl. The cowl is worked in the round using a textured combination of front post double crochet and half double crochet stitches. This creates vertical ridges that add warmth and visual interest while keeping the neck snug. You can customize the cowl height depending on whether you prefer a fitted neck or a fold over collar. Optional fringe along the slanted edges completes the look with movement and softness.
Materials
- Bernat Super Value medium weight yarn approximately 440 yards or 402 meters
- 5.0 mm crochet hook
- Tapestry needle
- Scissors
- Measuring tape
Abbreviations
- ch = chain
- dc = double crochet
- sc = single crochet
- hdc = half double crochet
- fpdc = front post double crochet
- sl st = slip stitch
- sp = space
Construction Overview
- The shawl is worked flat from the top center downward.
- Rows alternate between mesh and block stitches.
- The center increase happens in every row at the middle peak.
- Once the triangle is long enough, the top corners are joined.
- The cowl is worked in rounds around the neckline.
Triangle Shawl
Foundation
- Ch 4.
- Join with a sc to the first chain to form a ring.
- Ch 4.
- Work 4 dc into the ring.
- Ch 4 for the center peak.
- Work 4 dc into the ring.
- Ch 2.
- Work 1 dc into the ring.
- Turn your work.

Mesh Row
- Ch 4 and turn.
- Sc into the first space.
- Ch 4.
- Sc into the next space.
- At the center peak space, work ch 4, sc, ch 4, sc all into the same center space.
- Continue ch 4 and sc into each space across.
- End with ch 2 and 1 dc in the third chain of the turning chain.
- Turn your work.
Block Row
- Ch 4 and turn.
- Work 4 dc into the first chain 2 space.
- Work 4 dc into each chain 4 space across until you reach the center.
- At the center peak, work 4 dc, ch 4, 4 dc all into the same center space.
- Continue working 4 dc into each chain 4 space across to the end.
- End with ch 2 and 1 dc in the third chain.
- Turn your work.

Repeat Rows
- Repeat the Mesh Row and Block Row.
- Continue alternating these two rows.
- Measure from the top center down to the point.
- Stop when the center front measures approximately 12 to 13 inches or your desired length.
- Finish on a block row for a clean top edge before beginning the cowl.
Cowl Neck

Joining the Corners
- Fold the shawl so the two top corners meet evenly.
- Join them securely with a sl st or by working directly into both edges together.
- Ensure the neck opening sits flat and untwisted.
Base Round
- Ch 2.
- Work 2 dc into each space around the neck opening.
- At the very center front stitch, work only 1 dc to avoid bulk.
- Continue evenly around the entire neckline.
- Join with a sl st to the first stitch.
Textured Pattern
- Ch 2.
- Work 1 fpdc around the next stitch.
- Work 1 hdc into the next stitch.
- Repeat fpdc and hdc all the way around.
- Join with a sl st.
Beyond
- Ch 2.
- Continue alternating fpdc and hdc around.
- Work fpdc around each fpdc from the previous round.
- Work hdc into each hdc from the previous round.
- Repeat for 7 to 15 rounds depending on desired height.
- For a fold over cowl, work additional rounds.
- For a shorter neck, stop earlier.
Tip for Straight Ridges
- To prevent the ridges from slanting, slightly shift where you insert the hdc every other round.
- On one round, insert hdc normally into the stitch.
- On the next round, insert hdc slightly to the opposite side of the post to balance the twist.
- Continue alternating this adjustment as needed.
Finishing

Fringe
- Cut yarn strands approximately 16 inches long.
- Group 4 strands together.
- Fold the group in half.
- Insert hook into the spaces between the 4 dc blocks along the slanted edges.
- Pull the folded loop through the space.
- Pull the ends through the loop and tighten to secure.
- Repeat along both slanted edges evenly.
- Trim fringe evenly after attaching all pieces.
Final Steps
- Weave in all remaining yarn ends securely.
- Shape the shawl gently.
- Lightly block if desired to open the mesh and define the triangle shape.

Leave a Reply