
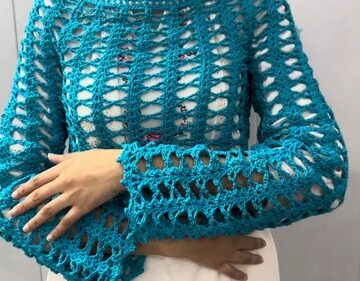
This Pinterest-inspired mesh cover-up crochet pattern is your go-to project for crafting a lightweight, stylish, and breezy garment perfect for beach days or casual summer outings. Designed with a trendy open-mesh texture, this cover-up drapes beautifully over swimsuits or tank tops, making it a versatile addition to any warm-weather wardrobe.
Crochet Mesh Cover Up

Whether you're lounging poolside or strolling through summer markets, this piece adds a handmade charm to your outfit. Suitable for adventurous beginners and seasoned crocheters alike, the pattern offers size flexibility and simple construction with plenty of room for personalization. Plus, it’s a fantastic stash-busting project if you have extra worsted-weight yarn on hand.
Materials Needed
- Worsted-weight yarn (approx. 340g for sizes L–XL; cotton preferred)
- 4.25 mm (G6) crochet hook
- Tape measure
- Stitch markers
- Darning needle
- Scissors
Measurements
- Measure shoulder-to-shoulder and add 7 inches to determine your width.
Creating the Mesh Rectangle
- Make a slip knot.
- Chain 90 (or any multiple of 3 + 2).
- In the 8th chain from the hook, make a double crochet (dc).
- Chain 3, skip 2 stitches, dc in the next stitch — repeat to the end.
- Chain 6 and turn.
- Dc into the top of the next dc.
- Chain 3, dc in the top of next dc — repeat to the end of the row.

Repeat this row pattern until your rectangle reaches 33 inches (approx. 57 rows).
Creating the Front Panels
- Mark neckline and shoulders, dividing the mesh into 3 equal sections.
- Chain 6 and turn.
- Dc in next dc, ch 3, dc in next dc until the stitch marker.
- Chain 6 and turn.

Repeat the mesh pattern for 10 rows.
Shaping the V Neck (Increases)
- Chain 6.
- Dc in the same space.
- Chain 3, dc in next dc — repeat to end.
- At the end of each row, ch 3, dc into the 3rd chain to increase.
- Continue for a total of 5 increase rows.

Completing the Front Panels
- Continue the mesh pattern: ch 6, dc in next dc, ch 3, repeat for 57 rows.
- Repeat the same pattern on the opposite side to mirror the front panels.
Creating the Sleeves
- Mark where sleeves begin, approximately 8 inches from the top.
- Chain a length equal to 6 inches down from stitch marker.
- Slip stitch to secure and cut the yarn.
- Reattach yarn on the other side and repeat for symmetry.

Adding a Single Crochet Border
- Work a single crochet row around the entire front opening.
- Alternate 2–3 single crochets per space for flexibility and shape.
- Repeat on both front panels.
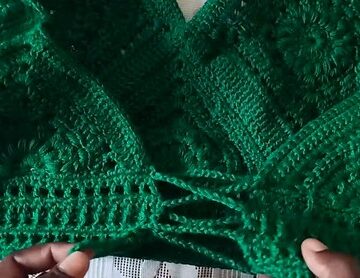
Crisscrossing the Cover-Up
- Place your work wrong-side facing up.
- Pin front panels with stitch markers for alignment.
- Attach yarn and crochet a single crochet row.
- Chain approx. 6 inches for the crisscross.
- Pin ends down and continue chaining, connecting with opposite side.
- Make single crochets across both panels to secure.
- Repeat the crisscross on the opposite side.

Final Touches
- Add a final single crochet border around the sleeves and bottom hem for a clean finish.

Leave a Reply