
Crochet a small dog sweater can be a fun and rewarding project, and this Ledger Dog Sweater pattern is no exception! Designed with simplicity in mind, this pattern offers an easy way to create a cozy and stylish sweater for your pet. The final product will keep your dog warm and comfortable while looking adorable.
Crochet Small Dog Sweater

This pattern includes a ribbed collar, a comfortable body, and leg holes that are easy to follow. Plus, you can customize the sweater to fit your dog's exact measurements and add any personal touches you like. Whether you're making it for your own pup or as a thoughtful gift, this dog sweater is sure to be a hit!
Materials
- Yarn: 100g of medium-weight yarn (approx. 150m or 150 yards). In Australia, this is referred to as 10-ply.
- Hook: 5 mm crochet hook.
- Tools: Yarn needle and a pair of scissors.
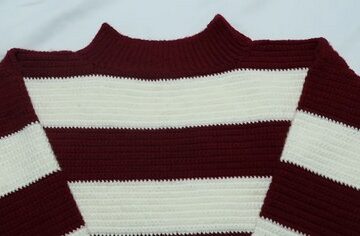
1. The Collar (Ribbing)
- Starting Chain: Chain 9.
- Row 1: Single crochet (SC) in the second chain from the hook, and SC in each chain across (8 SC total).
- Rows 2-48 (or until required length): Chain 1, turn your work. SC into the back loop only in every stitch along (8 SC total).
Note: This creates the ribbed texture of the collar.

- Finish Row 48: Chain 1 (do not turn your work yet).
2. Collar Edge & Leash Hole (SC Row)
- Set-up: Turn the collar so you are working along the long edge.
- Part A: Single crochet into the top of each of the next 20 rows of the collar edge.
- Leash Hole: Chain 8.
- Part B: Skip 8 single crochet rows, and then single crochet into the 9th stitch. Continue to single crochet into the rest of the single crochet rows (this should be 19 more SC, for a total of 20 SC on this side).
- Stitch Count: The total count for this row is 48 stitches.
- End of Row: Chain 2, and turn your work.
Note: The Chain 2 does not count as a stitch throughout the body pattern.
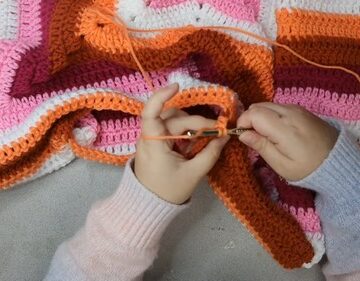
3. The Body (Double Crochet and Increases)

Row 1 (Body):
- Increase: Double crochet (DC) 2 times into the first stitch (this is an increase).
- DC into every stitch until you reach the chain section.
- DC 8 times into the chain stitches (one DC into each chain).
- DC into every stitch until the last stitch.
- Increase: DC 2 times into the last stitch.
- Stitch Count: 50 stitches total.
- End of Row: Chain 2, turn your work.
Rows 2-6:
- Increase: DC 2 times into the first stitch.
- DC into every stitch along the row (this will be 48 DC in Row 2, then 50 DC, 52 DC, 54 DC in the following rows as you increase on both ends).
- Increase: DC 2 times into the last stitch.
- End of Row: Chain 2, turn your work.
- By the end of Row 6, your stitch count should be 58 stitches.

4. Creating the Leg Holes (Row 7)
- Start: DC 6 times into the first 6 stitches (no increase this row).
- Leg Hole 1: Chain 10.
- Middle Section: Skip 10 stitches on the body, then DC 26 times into the next 26 stitches.
- Leg Hole 2: Chain 10.
- End Section: Skip 10 stitches on the body, then DC 6 times into the last 6 stitches.
- Stitch Count: 58 stitches total.
- End of Row: Chain 2, turn your work.
5. Straight Body Section
- Rows 8-17: DC 58 times (one double crochet into each stitch along the row, including the 10 chains from the previous row). Do not increase.
- End of Row 17: Chain 1, pull your thread through, and cut the yarn to tie off.
6. Back Flap (Decrease Section)
- Set-up: Turn your work. Attach yarn by skipping 7 stitches from the edge and creating a slip stitch in the 8th stitch.

Row 18:
- Chain 2.
- Decrease: Double Crochet 2 Together (DC2TOG) over the first two stitches (a decrease).
- DC 40 times into the next 40 stitches.
- Decrease: DC2TOG over the last two stitches.
- Stitch Count: 42 stitches total.
- End of Row: Chain 2, turn your work.
Row 19:
- Decrease: DC2TOG over the first two stitches.
- DC 38 times into the next 38 stitches.
- Decrease: DC2TOG over the last two stitches.
- Stitch Count: 40 stitches total.
- End of Row: Chain 2, turn your work.
Rows 20-24 (Remaining Decrease Rows): Repeat the decrease process from Row 19, decreasing at the beginning and end of each row.
- This will reduce the stitch count by 2 stitches per row.
- End of Row 24: You should have 30 stitches total (28 DC in the middle + 2 DC2TOG).
- Final Stitch: Chain 1, pull your thread through, and cut the yarn to tie off.
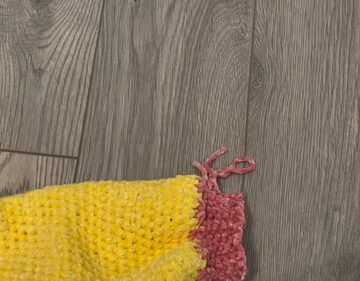
7. Finishing and Seaming
- Folding: Fold the sweater in half so the sides line up.
- Seam: Single crochet (SC) the two sides together from the bottom edge up to the armhole. Do not stitch the armhole or the back flap.
The video suggests going through both sides of the fabric and creating neat SC stitches.
- Tie Off: When you reach the armhole, slip stitch, pull your thread through, and cut it long enough to weave in.
- Weaving: Use your yarn needle to weave in all loose ends to secure them and trim any excess thread.
- Final Step: Turn the sweater the right way out.

Leave a Reply